Convert your Nexus 4 to F2FS without loosing data

Preface

My Nexus 4 was really slow because the sequential write speed of the filesystem was around 3MB/s. Random write speed was nearly zero…
Fstrim (or LagFix) didn’t help at all 🙁 I think a lot of you already know about F2FS the flash friendly file system from Samsung. Benchmarks show that it really boosts I/O Performance. So time for me to try it and see whether it will fix my performance issues.

F2FS (Flash-Friendly File System) is a flash file system created by Kim Jaegeuk at Samsung for the Linux operating system kernel. The motive for F2FS was to build a file system that from the start takes into account the characteristics of NAND flash memory-based storage devices (such as solid-state disks, eMMC, and SD cards), which are widely used in computer systems ranging from mobile devices to servers.

You can format your /data and /cache partition to F2FS. Normally you’ll loose all data in this process and have to reinstall everything. But this small howto will show you how to recover your data so you can continue where you left off. Just like a “dirty” ROM flash.

Note: In my mind it doesn’t make much sense to format/system to F2FS because you would need a modified ROM to use it. Everytime you update your ROM you would have to modify it to use /system as F2FS. On top of that there shouldn’t be a real performance gain with a F2FS /system partition because it’s read-only. And reading operations are fast with ext4, too. The difference is non-existent or very low. In my humble opinion the so called All-F2FS is pretty useless.


This following method should work with all devices which have FSFS compatible TWRP recovery, rom and kernel available.

Prerequisites

  • PC with ADB installed for SD backups
  • F2FS compatible ROM (all major 4.4 or 5.x ROMs like CyanogenMod 11/12, Omni, Paranoid, Carbon, … newer than 07/2014 should work) – Update your ROM before if it’s too old!
    • I’ve used cm-11-20141003-NIGHTLY-mako.zip
  • F2FS compatible Kernel
  • F2FS compatible TWRP Recovery (this recovery has F2FS support, too)
  • sdcard Fix Permissions script (scroll down a little bit)

Procedure

  • Flash the F2FS compatible TWRP Recovery with Flashify for example
  • Boot into Recovery
  • Backup > Data
  • Save your internal SD card with one of the following options
  • Either reboot to system and copy files to your PC via USB (MTP)
    • Or pull files via adb (adb pull /data/media sd_backup)
    • Copy the kernel and the sdcard fix script to your created backup folder
  • Wipe > Advanced Wipe > Data > Repair or Change File System > Change File System > F2FS
  • Wipe > Advanced Wipe > Cache > Repair or Change File System > Change File System > F2FS
  • Copy the saved SD card content back to your device with: adb push sd_backup /data/media/0/
    Afterwards the folder structure should look like this: /data/media/0/…Folders like DCIM, Music, Downloads, …
    You can check with: adb shell ls -R /data/media
  • Restore > Choose backup > Data (the warning about ext4 backup doesn’t matter)
  • Advanced > Fix Permissions
  • Flash the sdcard Fix Permissions script with: Install > Choose sdcard fix zip
  • Wipe > Advanced Wipe > Cache & Dalvik Cache
  • Flash a F2FS compatible kernel with: Install > Choose kernel zip
  • Reboot to system

Now your Android device should fly again 🙂

Cyanogenmod 10.2 for Nexus 4

Here are fresh builds of Cyanogenmod 10.2 for Google Nexus 4 (mako)

Download

ROM: http://obihoernchen.net/downloads/?dir=Nexus+4+CM+10.2
Gapps: http://obihoernchen.net/downloads/Gapps/pa_gapps-full-4.3-20130808-signed.zip

You can find Modems and Bootloaders there as well.

Update #01: New Build: 11.08.2013 ~ 13:30 – Changelog

Update #02: New Build: 12.08.2013 ~ 02:15 – Changelog

Update #03: New Build: 12.08.2013 V2 ~ 14:00 – Changelog

Update #04: New Build: 13.08.2013 ~ 09:30 – Changelog

Update #05: New Build: 14.08.2013 ~ 08:30 – Changelog

Das Mysterium – ZRAM

Da ich immer wieder so viele falsche Informationen über ZRAM sehe habe ich beschlossen mal etwas Klarheit in die ganze Materie zu bringen
Oft wird über einen Performance Vorteil gesprochen, da ZRAM schneller als Swap ist. Das ganze mag für normale PCs stimmen aber wir sind hier mit Android unterwegs und da sieht das ganze etwas anders aus!

Erst einmal eine kurze Feststellung für alle, die noch nicht so lange in der Android Szene unterwegs sind:
ZRAM = ramzswap = Compcache

Um ZRAM genauer zu erklären müssen erstmal andere Begriffe genauer geklärt werden:
Swap kann man mit der Auslagerungsdatei unter Windows vergleichen werden. Wird der Arbeitsspeicher (RAM) zu voll kann der PC die Daten, die gerade nicht aktiv gebraucht werden (z.B. Hintergrundanwendungen) auslagern um so wieder RAM frei zu räumen. Dazu werden diese Daten auf eine Festplatte geschrieben. Bei Bedarf können diese Daten dann einfach wieder von dort aus gelesen werden. Selbst die schnellste SSD ist aber langsamer als der Arbeitsspeicher. Unter Android gibt es Swap nicht!

Bei ZRAM werden nicht benötigte Speicherressourcen komprimiert und dann in einen fest reservierten Bereich im RAM verschoben (ZRAM). Also eine Art Swap Partition im Arbeitsspeicher.
Dadurch ist mehr Ram frei, da die Daten dann nur noch ca. 1/4 des ehemaligen Speicherbedarfs haben. Allerdings muss die CPU dadurch mehr arbeiten, da sie die Daten komprimieren muss (oder auch wieder entpacken wenn sie wieder gebraucht werden). Der Vorteil hierbei liegt ganz klar in der Geschwindigkeit. Da die Swap Partition sich im RAM befindet ist diese viel schneller als eine Swap Partition auf einer Festplatte.

An und für sich eine ganz tolle Sache. Aber Android besitzt keine Swap Partition und daher bringt ZRAM unter Android keinen Performance Gewinn wie es bei einem normalen PC der Fall wäre.

Beim normalen PC würde das folgendermaßen aussehen:
Swap = Auslagerungsdatei (auf Festplatte) –> Langsam
ZRAM (Swap im RAM) –> Schneller als Swap
RAM –> Schnell

Bei Android gibt es keine Swap Partition und daher bringt ZRAM auch keinen Performance Boost.
Das einzige was ZRAM bringt ist “mehr” RAM. Durch das komprimieren “vergrößert” sich sozusagen der verfügbare Arbeitsspeicher. Das ist auf Geräten mit sehr wenig RAM (<256MB) auch ziemlich nützlich. Das S2 hat aber 1GB und die reichen mehr als aus. Da muss nicht künstlich auf 1,5GB hochgepusht werden.

Denn aktiviert man ZRAM hat das auch 2 Nachteile. Das komprimieren und dekomprimieren verbraucht CPU Time, welche wiederum höheren Stromverbrauch zur Folge hat.

Grob kann man also sagen (Für Geräte mit mehr als 512MB RAM):
Ohne ZRAM: +CPU Performance | +Battery | -RAM
Mit ZRAM: -CPU Performance | -Battery | +RAM

Für Geräte mit zu wenig RAM also durchaus sinnvoll. Aber wer ballert beim S2 schon sein kompletten RAM voll und braucht dann immer noch mehr?

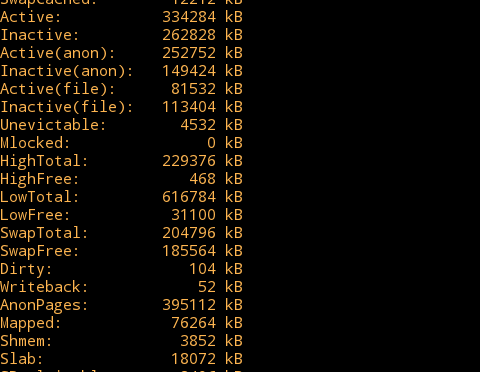
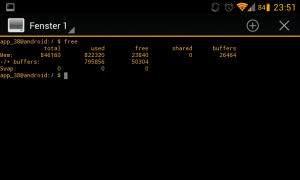
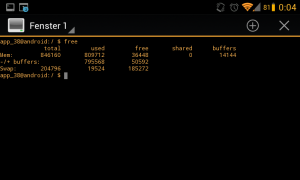
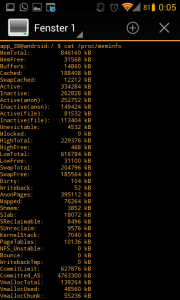
Überprüfen ob ZRAM läuft kann man im Terminal mit
free oder cat /proc/meminfo

ZRAM aus:

ZRAM an:

Weiterführende Infos:
Swap and Compcache – CyanogenMod Wiki